Netplan은 우분투의 네트워크 설정을 다루는 파일이며 와이파이 이더넷 등을 설정할 수 있다.
설정 파일을 다루기 전에 와이파이 및 이더넷의 명칭이 필요하다.
따라서 아래 명령어를 이용하면 사용 가능한 인터넷 장치를 볼 수 있다.
sudo lshw -C Network
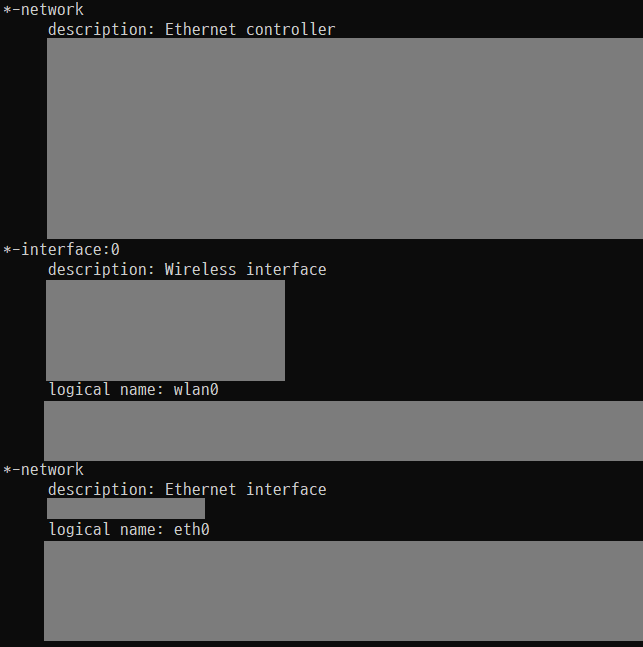
여기서 유선은 Ehternet interface, 무선은 Wireless interface에 해당하며
각각의 logical name을 이용하여 netplan 파일에서 설정한다.
netplan 설정 파일은 보통 /etc/netplan/00-cloud-init.yaml 파일로 존재한다.
파일의 형태는 아래와 같다.
# This file is generated from information provided by the datasource.  Changes
# to it will not persist across an instance reboot.  To disable cloud-init's
# network configuration capabilities, write a file
# /etc/cloud/cloud.cfg.d/99-disable-network-config.cfg with the following:
# network: {config: disabled}

network:
    version: 2
# 이더넷 설정
    ethernets:
        {유선-logical name}:
            dhcp4: true
            optional: true
# 와이파이 설정
    wifis:
        renderer: networkd
        {무선-logical name}:
            access-points:
                {wifi-name}:
                    password: "{password}"
            dhcp4: true
            optional: true

# 예시
#network:
#    version: 2
#    ethernets:
#        eth0:
#            dhcp4: true
#            optional: true
#    wifis:
#        renderer: networkd
#        wlan0:
#            access-points:
#                NotebookSpot:
#                    password: "password"
#            dhcp4: true
#            optional: true
필자는 유선과 무선 logical name이 각각 eth0, wlan0이지만
환경마다 이름이 다를 수 있다.
그 환경의 이름에 맞게 설정해서 실행하면 된다.
참고 사이트
https://it-racoon.tistory.com/3
'개인 공부' 카테고리의 다른 글
| NextCloud와 Caddy를 이용한 개인 드라이브 구축 4 (with Docker) (0) | 2025.01.23 |
|---|---|
| NextCloud와 Caddy를 이용한 개인 드라이브 구축 3 (with Docker) (0) | 2025.01.23 |
| NextCloud와 Caddy를 이용한 개인 드라이브 구축 2 (with Docker) (0) | 2025.01.23 |
| NextCloud와 Caddy를 이용한 개인 드라이브 구축 1 (with Docker) (0) | 2025.01.23 |
| 운영체제 공부 혼자 요약 (Operating-Sysyem) (0) | 2024.06.26 |